Tuesday, April 14, 2015

Discovering Breakfast


Breakfast is for sure my favorite time of  the day. There are so many possibilities. It sets the tone of your mood and daily activities, at least it does for me. If I have a less then perfect breakfast, it throws off everything else that I do. There is no other way to make me more "hangry" then skipping that first meal. By the time lunch rolls around, I'm so hungry and flustered that if you ask me what I want to eat, I can't even process my thoughts. I get so mad at myself that I skipped my first and favorite meal of the day, I wine loud enough for the whole world to hear. That being said, I really try not to skip breakfast. 

Everything has trends, even food. The latest trends in the world of breakfast seems to be these breakfast bowls. Its like a parfait transferred into a bowl, with more ingredients and, in my opinion, easier to eat. Parfaits always looked good to me, but I never wanted to take the effort to make one. Too many layers and steps for something so simple as breakfast. This is probably why people usually pick one up at their local deli instead of going through all the hoopla in their own kitchen. Breakfast shouldn't be stressful, and if it is, you're doing something wrong. 

It's a gloomy day here in New York. This makes motivation to do anything at an all time low. The clouds are grey and so is my mood. The first thing I do in the morning is go into my kitchen and figure out what I'm going to eat. On days like this, I prefer to make minimal efforts. First, I thought waffles. But, did I really want to stand over a waffle iron after making a batter from scratch? Nope, too much work. I thought maybe if I came back to bed, it will come to me. Instagram is great for times like these. Just search up some breakfast and brunch hashtags and there you have it, your next meal. As I'm searching, all I see are these fabulous breakfast bowls that you can just throw everything but the kitchen sink in. This seemed right down my alley on a day like this. 

This breakfast bowl was so easy to make. It was so colorful that it actually added a burst of brightness to this depressing overcast. All I did was mix some yogurt and almond milk so the yogurt had more of a smooth consistency. After, I took a handful of frozen blueberries and heated them up in a saucepan so the juices would get nice and runny. I sliced up some banana and then put a handful of granola right in the middle. Just like that I had my first breakfast bowl. I have a feeling im going to be   experimenting alot with this new trend. Thanks to breakfast bowls, it was a good morning.

Heres to many more 💕☀️


Friday, February 6, 2015

Favorite product for winter


I hate everything about the winter. Seasonal depression is at an all time high this year right along with hibernation. The constant snow and low temperatures make it so unappealing to leave the house. Not only does the frigid air affect the ability to enjoy anything, it also has big affect on your hair. 

When the weather is dry and lacking any moisture in the air, your hair can become dry and brittle, causing breakage to happen. This is the season where nourishing and taking care of your hair really counts. Adding an extra step in your hair care routine can make all the difference.

Spending time in a salon everyday really allows me to try a variety of products and see which ones appeal to me most. This doesn't mean I'm just trying them on myself. I get to see what products are best for many different hair types. Kerastase is a luxury hair care brand by L'oreal and has amazing masks for you to use at home or even to get a treatment with in the salon. For the winter time, the Masquintense by Kerastase has been my go-to product for moisture. 

Hair Types

Although amazing, this mask isn't for everyone. This mask is extremely concentrated, which means it can be on the heavier side. If you get oily roots faster then you would hope, then you may need to opt for something lighter. If your used to just putting your conditioner towards the mid shaft and ends of your hair, then you can do the same with this mask. This mask also isn't for hair with a finer texture. If your always trying to bump up the volume in your hair, try something different. 

This mask is for you if you have dry and sensitized hair. Whether it's from overusing hot tools or over processed hair from color, this mask can give you the moisture it needs to get healthy and beautiful. 

How to use 

To get the full benefits from this mask, it should be used the right way. After shampooing your hair thoroughly, towel dry and get all the excess moisture out. Apply the mask to your hair in sections while combing through to make sure the mask is distributed evenly. Place a plastic cap over your hair to keep moisture in. Let it sit for 25 minutes then rinse with cool water. Do this once a week and you will feel the difference! 


Friday, January 9, 2015

Pinching your Pennies


Getting your color done is expensive, I get it. Going to the salon every time you need a root touch up can empty your pockets real fast and make it an unenjoyable experience. Getting your hair done should be a treat, not a chore. No one wants to be sitting and dreading about when they finally have to checkout. After a few times of this happening, you finally resort to the dreaded box color from your local drugstore and when you run into a color mishap, it's back to the salon with a color correction that you'll be charged like crazy for. 

Luckily, there are actually ways you can get your hair done, by the professionals, without spending your whole paycheck. 

1. Opt for hairline process instead of a full single process

                 I have some clients coming to me every 3 weeks to get their roots touched up. Coming in that frequently can get pretty pricey and become unaffordable. This is when I recommend getting hairline process instead of a full single. Instead of doing the full root touch up, I'll just do around the perimeter of the head and crown area, leaving out that section in the back of the head that no one sees. This can cut your bill back up to 35 dollars.  

2. Keep up with your glosses 

                   Many times you can get to that annoying stage with your color. It's that stage where you're not quite ready to get your roots touched up but your color is fading out or getting brassy and needs be spruced up a bit. Getting a gloss done will freshen up your color and help it last a little longer between appointments. A gloss typically ranges from $40-$55, much less than a root touch up. 

3. Get a base break 

                   The most irritating thing for blondes is when those highlights start growing out and the dark roots start coming in. Shelling money out for highlights every 8-10 weeks isn't so fun. A base break is an inexpensive way to soften up your base color in between while stretching out that time frame. What it does is it lightens up your base color by a half of a shade, making everything appear brighter and more natural. It's a lot easier on the pockets compared to highlights. 

4. Go for a face-frame 

                 Many clients think the only options for highlights are either partials or full heads. The face frame highlight is usually overlooked. Getting constant partials and full heads usually result in a over processed, overly lightened blonde. Most of the time, a face frame is all you really need. A face frame is highlights that are put around the front if the face and maybe a few in the crown area. This also allows dimension to be kept in the hair over time. This is a great alternative for a quarter of the price for a full head.

5. Try some balayage

               Covering up gray roots are one of the most common reasons for getting a single process. Gray roots creep up on you pretty fast, especially for brunettes. That white hair against a dark haircolor can be annoyingly noticeable. Getting some lighter balayage Peices around the frame of the face and crown area can soften up the growing out process and can even stretch your next hair appointment for a few weeks. That's money saving in itself.


Hopefully, you read these carefully, don't resort to the box, and leave the color to us. These are great ways to save money while sticking to the professionals. 

Thursday, December 11, 2014

The Balayage Breakdown


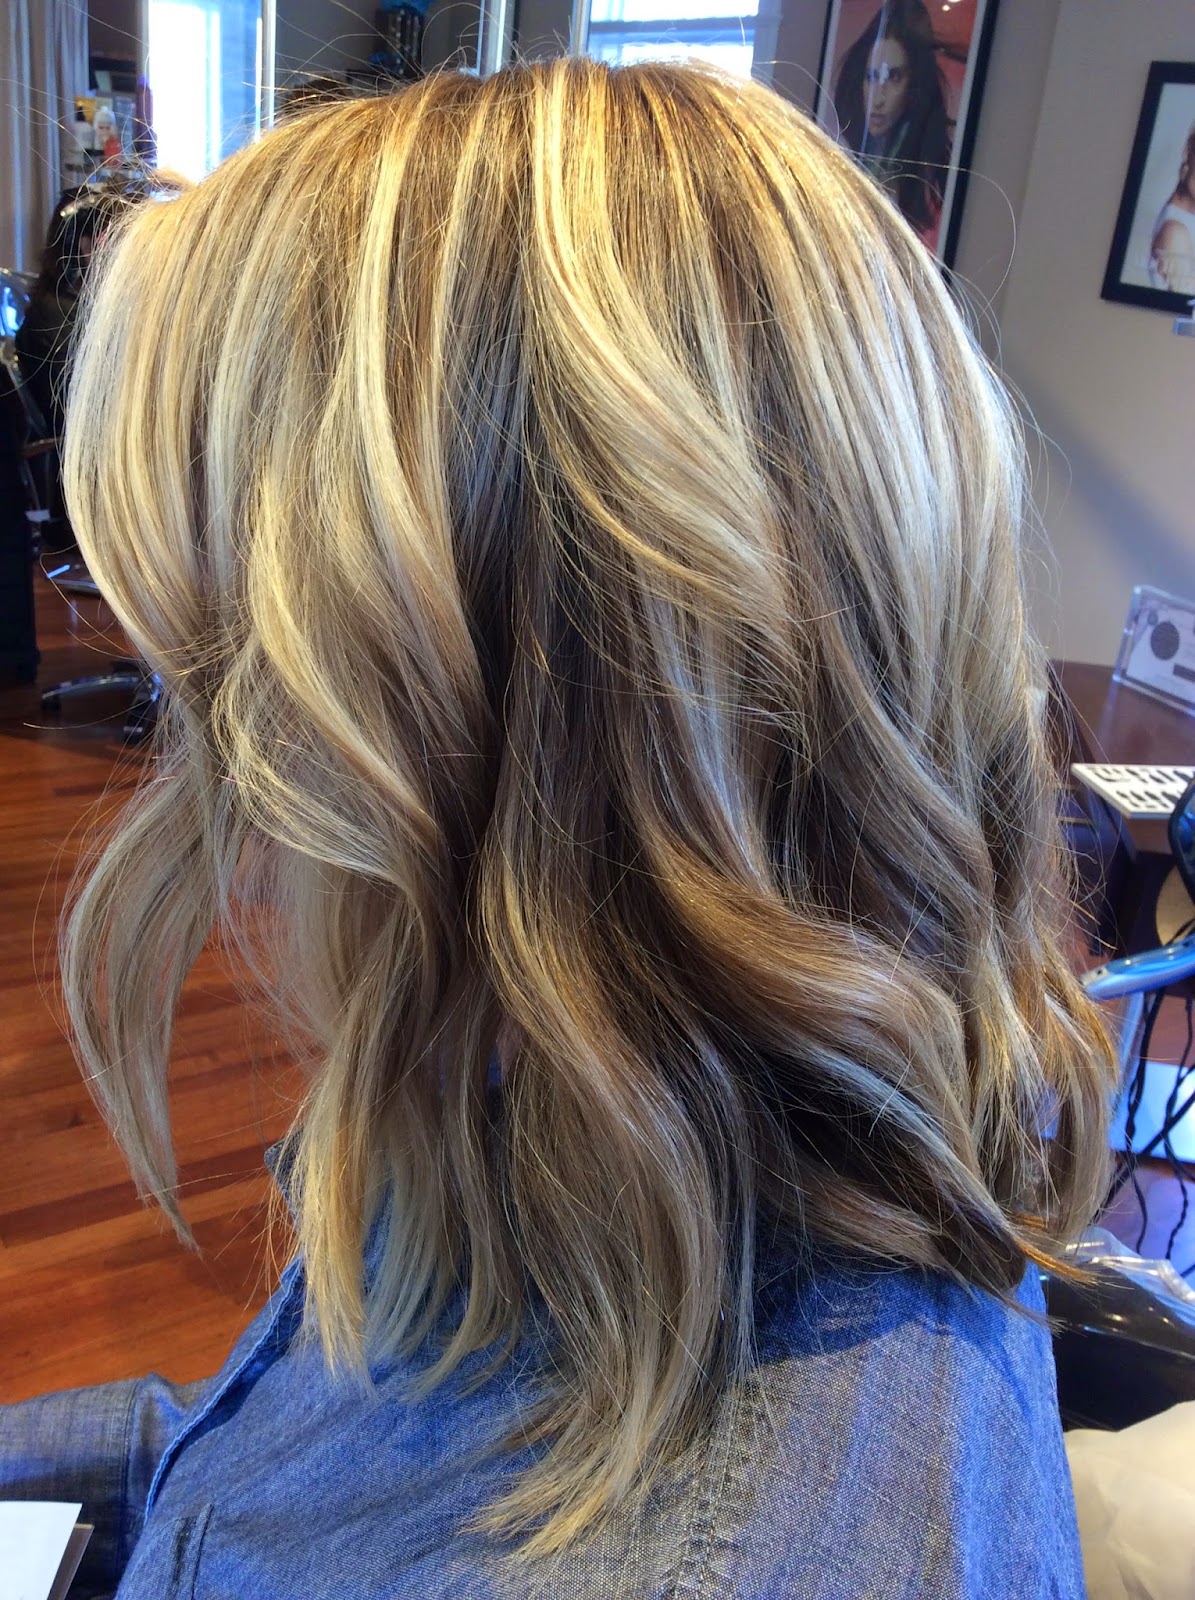
What is Balayage? Most clients think I'm speaking a foreign language to them when they hear this word. Well, technically I am. Balayage is a French term that translates to "to sweep". This  application technique has swept the nation the past couple of years and now is a growing trend done in salons every day. Many clients are still uniformed about balayage and how they can use it to their advantage. Knowing the difference between this technique and more traditional techniques can help help anyone figure out if balayage is right for them.


1. Balayage does NOT mean ombre 

                      Every time the word "balayage" comes out of my mouth, clients automatically assume that I am talking about Ombre and might be immediately turned off. Balayage is often associated with ombre because this is a technique that is commonly used to create the gradual effect ombre is known for. This technique can be used to create all types of variations of color. A client can have anything from the most subtle, natural looking highlights to a bright, sun kissed blonde from roots to ends. 

2. How is it done 

                     Balayage is a free-hand technique as apposed to the traditional foil patterns. Using just a brush and a paddle to apply, the product is painted on with full control by the colorist. The colorist can control how big or small any section is and can put the product wherever they choose to put it. 

3. Custom colored hair

                      Since the colorist has complete control to put the product wherever they please, this gives the advantaged to personalize anyones hair color. No two clients will ever look the same, therefore not everyones color should be done the same. Every client has a different eye color, skin tone and natural base color. Their hair color should be personalized for them from placement and tone to compliment their natural features

4. Healthier than highlights 

                       Balayage can be considered a much healthier approach than traditional highlights. Traditional highlights are done by placing hair into aluminum foil. Heat is produced inside the foil, causing the product to process more rapidly. If the hair is not checked frequently, it can be left inside the foil for to long and this can eventually cause breakage. Hair that is balayaged is left by itself with only a layer of cellophane over it. The cellophane generates very little to no heat and being that it's translucent the hair can easily be watched. 

5. Longevity 

                    The great thing about balayage is that your most likely not running to the salon every 6-8 weeks to get your roots done. Since it is often more of a natural look, the growing out process is much more forgiving then traditional highlights. Sometimes, it actually looks better the more it grows out because that harsh root line is more softer and subtle. This allows the next salon visit to be stretched out a few more weeks or even months. 


The balayage technique is used to create beautiful colors. For those who want a more natural look or just looking to try something new, this is a great thing to consider during your next appointment. 


Friday, November 28, 2014

The Harry Josh Dryer


Sooner or later finally comes that time that some of us dread. Our blowdryers just don't work up to par anymore. Its one of those appliances that you just have to keep replacing eventually as time goes on. I was in denial about it for a few weeks, acting like it was totally normal that it smelled like burnt hair while it was running. I finally caved when a co-worker started using it. She turned to me and said "Missy, your blowdryer sucks, just please get a new one". The search started.

 Being in the hair industry, a high quality blow dryer was crucial. I wanted something lightweight, easily transportable and had a strong air flow. Being a Twin Turbo girl for so long, I wanted to venture out of my comfort zone and see what else was out there. I searched through different brands comparing prices, size, weight and wattage. I'm someone who is very visual, so when I came across this fun-sized, mint green blowdryer I was automatically intrigued. 

The Harry Josh Pro Tools 2000 dryer definitely had its own character from the rest of the dryers I've seen. It had a unique retro feel and didn't look like it would feel as if I was drying hair with a 10 pound weight. I read tons of positive reviews about it and even articles from other beauty bloggers giving their opinion. I read about its 9 inch cord, green energy system that reduces energy use by 70%, and its extra cold push button for setting styles. At the time of my research, I found it in a package deal that came with brushes and clips for $250 on Hairenvy.com (I think this is still being offered).  I decided to take the plunge and make the purchase. 

My blowdryer had arrived and I was so excited to try it. I pulled out the pint sized dryer and immediately plugged it in. I was pleasantly surprised with how strong and hot the airflow was for a small little gadget. I clicked on the cool shot button and the air didn't go to just room temperature, it actually got cold enough to cool down hot hair. It also had a nifty little ION button for you to decide whether you want to use the ION technology or not. The cord length was much longer then any other dryer I had owned and the weight of the dryer wasn't tiring to my arm. Luckily my mom needed her weekly blowout that night so I able to test it out right away. 

Since I've been using the same dryer for so long, it took a few minutes to really get used to a new one. I couldn't tell right away how much I loved it since I was so out of my comfort zone. After a few sections of hair I became more adapted and realized how happy I was with it. The strong hair flow made for a quick and smooth blowout, lightweight helped with handling of the tool, and the cool shot button helped with longevity of the style. All around I give this blowdryer 2 thumbs up.


Friday, November 7, 2014

The PROPER way to arrive at your color appointment


A fellow colorist had recently said something to me that opened my eyes a little more about the industry I am in. "We are not in the hair business, we are in the people business". Everyday I have the chance to study how people work and build a one-on-one connection with a complete stranger. I learn their likes, dislikes, family history, all the places they have lived, and everything else under the sun you can imagine. Each client is completely different, which makes my job that much more fun. However, I have seen one similarity between everyone of them. No one knows how to be prepared a hair appointment. 

I can't tell whether or not it's actually common knowledge on how to arrive into a salon. Maybe it's that I'm just a salon professional so I know all the proper ways and clients actually have no clue? Either way, I would like to educate everyone on what to do so you are ready for your colorist to work their magic. 

1. Someone else's sweat isn't something we want to get our hands in

                         I understand you have your workout routine and need to be in the gym at the same whatever time every single day. But please, work it around your hair appointment. It's not going to kill you if your there at 5 in the afternoon instead of 2. It's just once every few months that you have to rearrange your schedule a little bit. When you come in with a head full of sweat and tell me you didn't have time to wash it, the first thing I think is "Oh great, just what I was hoping for". It doesn't make us want to touch your head. It just turns into a chore and we have to immediately go to disinfect our hands because of the sweaty client. Please, don't be the sweaty client. 

2. Be hygienic and make sure your hair is clean

                      Please don't come in to me and say you haven't washed your hair in 4 days. Do you know how much oil collects on your roots just in 4 days? Not only is it very unappealing for us to touch, but it actually changes the way color reacts to your hair. When you have an outer layer of oil coating your hair, it can slow the processing time down and even make it difficult for color or any lightener to penetrate into your hair to begin with. It can create unexpected results which isn't great for you or your colorist. To get the most benefit out of what your paying for, show up with freshly washed hair. This will allow the colorist to properly predict what they can do for you. Those oily roots also mess with where color is placed. Oily hair falls differently then clean hair, which automatically will shift what type of sectioning or patterns your colorist is placing on your head. 
                    An oily scalp isn't the only reason you should wash your hair, product buildup is another. If you use hairsprays, mousses, gels or any other thick product that makes your hair feel like straw, please wash it out. It does not make the color application more efficient when there is a hair that is clumped up like a ball of hay from using to much hair spray or mousse. Not only will it slow the application time down, it also might be uncomfortable to you when I tug and pull to try and separate those stuck-together strands. So, for your benefit and mine, wash your hair. 

3. Do not show up with it soaking wet
                   
                  After your hair is all washed and cleaned, pick up that dryer and blowdry your hair. Not damp, not 75% dry, not mostly dry in the front and a little wet in the back, DRY. When you make an appointment with your colorist, you are not the only appointment of the day. Even though you have a special bond with them and you think you have all the time in the world to dilly dally when you get there, you don't. Colorists love spending time with there clients and getting to know them more, but unfortunately, time is of the essence. From the moment you sit down in that chair the clock is ticking until it's time for the next client to come in. When you arrive to your appointment with wet hair, that time booked only for what you requested has been disrupted. Now, your colorist must get their blowdryer out and take however many more minutes to dry your hair for you. Ten minutes as rolled by and your hair is finally dry. Unfortunately, those small ten minutes to you is a big ten minutes to your hairdressers next client, who has been waiting ten minutes past when her appointment was scheduled for because you weren't prepared for your appointment. To avoid any time management issues during your time at the salon, arrive with dry hair. 

4. Actually brush your hair
                     
                      After the experience I had with a client last week, please, I beg you, brush your hair properly. A mother brought in her 16 year old daughter to get her hair highlighted for an upcoming event. I looked at my schedule and saw I was booked the proper amount of time to give her what she wanted. My next client was due an hour after her so I had to make sure I was running on schedule. I walked over to the girl and her mother to discuss what she was looking to achieve. Halfway into the client consultation the mother had said to me that there was a small knot in the back of the girls head. The fact that she had to stop and make me aware of a "small" knot made me a little skeptical. Before we continued, I took a look through the girls hair to see what I was really getting myself into. There it was, a knot of matted, tangled, hard as a rock hair that was the size of my fist. Picture a dread-lock in a baseball form. This wasn't something a brush and some conditioner would handle. This knot was at the point of taking over 30 minutes to remove. I had explained to the mother that since the knot had to be taken out, the daughter might miss her appointment due to the time that it takes to remove something like that. Finally, halfway into her appointment, the knot was out. I still had a half hour left to do something to the girls color where it looked refreshed for her event, but not what she originally made her appointment for. If the girl was prepared and showed up with her hair tangle free, she would of been given the service she intended to have. Brush your hair. 


5. Know what you want

                    There are many times when a client comes into me and has no idea what they are looking to do. No matter how hard you try to get on the same page, everyone has different versions of what colors are what. My caramel tone and honey blonde can be totally different then what you think is it. Visuals are the biggest thing I encourage. Bring in pictures, photographs or whatever you decide to show for what you want your hair to look like. The best investment I've made this year was my Ipad. If a client comes in and is confused about what they are looking for, I just pop up Pinterest and tell them to search through different looks. Finding a common ground with your colorist is very important. We are there to make you happy and make you feel beautiful. When we know what you have in mind and are given the right tools, we can achieve whatever look you dream to have. 


I hope you take everything I've said here into consideration when you are getting ready for your hair appointment. Your time is valuable and to make sure its not wasted, prepare for your colorist properly. 

Sunday, November 2, 2014

Homemade Peppermint Hot Cocoa


Novemeber 1'st isn't only the day after Halloween. It's also the day we start getting into holiday season mode. Don't get me wrong, I love Halloween. It's right up there with Christmas for me. But, the second it's over, It's spreading holiday cheer all the way. I get my ugly sweater out and DVD's of Elf and How The Grinch Stole Christmas. The temperatures outside are starting to drop down into hibernation season, which makes it perfect weather for hot cocoa. I'm someone who hates the cold and will love anything that keeps me warm. While I was in the supermarket yesterday, the shelves were stacked with all things Christmas. These items included candy canes and one of my favorites, Andes chocolates. Peppermint Hot Cocoa immediately came to mind. I'm more for homemade hot cocoa. The packaged stuff is way to watery and generic while homemade is thick and creamy. It's a dessert in itself. Today was the perfect afternoon to make it. It was windy with an uncomfortable chill in the air. Needless to say, the hot cocoa didn't last too long. I curled up on the couch with a blanket and sipped it as I watched my dad, through the window, clear the yard for our wood delivery. It made me think that this would be even better in front of our wood burning stove. I see many batches of this being made this holiday season. 


Peppermint Hot Cocoa

2 Cups of  Whole Milk

1 Tablespoon of Brown Sugar

4 oz of Bittersweet Chocolate

5 Andes Chocolates

1/8 Tsp of Cinnamon

1/4 Tsp of Vanilla 


Step 1: Pour the milk and cinnamon into a sauce pan and heat on low-medium until it comes to a slight simmer. 

Step 2: Whisk in chocolate and andes chocolates and leave for 1 min. 

Step 3: Turn of heat and whisk in cinnamon and Vanilla. Let steep for 10 minutes. 

Step 4: After 10 minute, turn heat back on until hot cocoa is fully heated. Pour into mug. 


Whipped Cream

1/2 Cup of Heavy Cream 

1 Tablespoon confectioners suger 


Step 1: With a handheld or electric mixer, mix cream until the consistency is thick. 

Step 2: Mix in confectioners sugar 

Step 3: With a piping bag, pie whipped cream on top of Hot cocoa. 

Step 4: Garnish top with crushed candy cane pieces and stick a candy cane on the side for extra peppermint flavor. 


I hope this recipe keeps you as warm as it kept me. :)