Tuesday, July 7, 2015
Taco Tuesday
I don't know about you, but tortillas out of a plastic bag just don't do it for me. They're stale, flat and the taste is so bland it's like eating floppy cardboard. I've been on the hunt for an easy tortilla recipe that doesn't sacrifice the taste and texture. Most of the ones I came across contained yeast and took a few hours to prepare. I just don't have that kind of patience during the summer, I want an ASAP recipe and relax the rest of the day, tacos in hand.
Last week I was doing my usual Pinterest surfing for some new ideas. I came across such a foolproof recipe that anyone can do it. You don't need to be an expert and you can have fresh made tortillas within 20 minutes. I have stand mixer with a dough hook so for me it was a less challenging then if you don't own these things. Not that it's hard to mix the dough together with a wooden spoon, just takes a little more elbow grease to get it done.
Ingredients you will need
2 cups Flour
1 tsp salt
1/3 cup extra virgin olive oil
3/4 cup of water
In a large bowl, or stand mixer fitted with the dough hook attachment, combine together flour and salt. Next, mix in olive oil and water until dough is well incorporated.
Divide the dough into ten round balls, about the size of a golf ball. Put them back into the bowl and cover with a damp towel so the dough stays moist.
Heat up a large skillet. Working with the dough balls one by one, roll out the ball into a thin circle. Place the rolled dough onto the hot skillet and cook until both sides are golden brown, about 2-3 minutes for each side.
Keep the tortillas covered so that they stay fresh and soft.
This is the part where you realize you will never buy tortillas in a supermarket again. It just seems unnatural. Since I had the bright idea of making these at 10 AM, I made an awesome breakfast quesadilla with eggs, avocado and cheddar cheese. I have a feeling my house will never be empty of these little gems.
Happy Eating!
Friday, June 12, 2015
The magic of a haircut
All hairdressers have their pet peeves. Whether it's clients who can't sit still or someone who is chronically late for their appointments, we get all the little quirks of human beings on a daily basis. You really have to have a lot of patience in this industry. That being said, one of my biggest pet peeves of all time are clients who will not and completely refuse to cut their hair.
Before I go any further, I'd like to give a big shout out to Francesca, who is my inspiration for this post. She knew the importance of cutting her hair after getting a fresh color and I applaud her for her good decisions
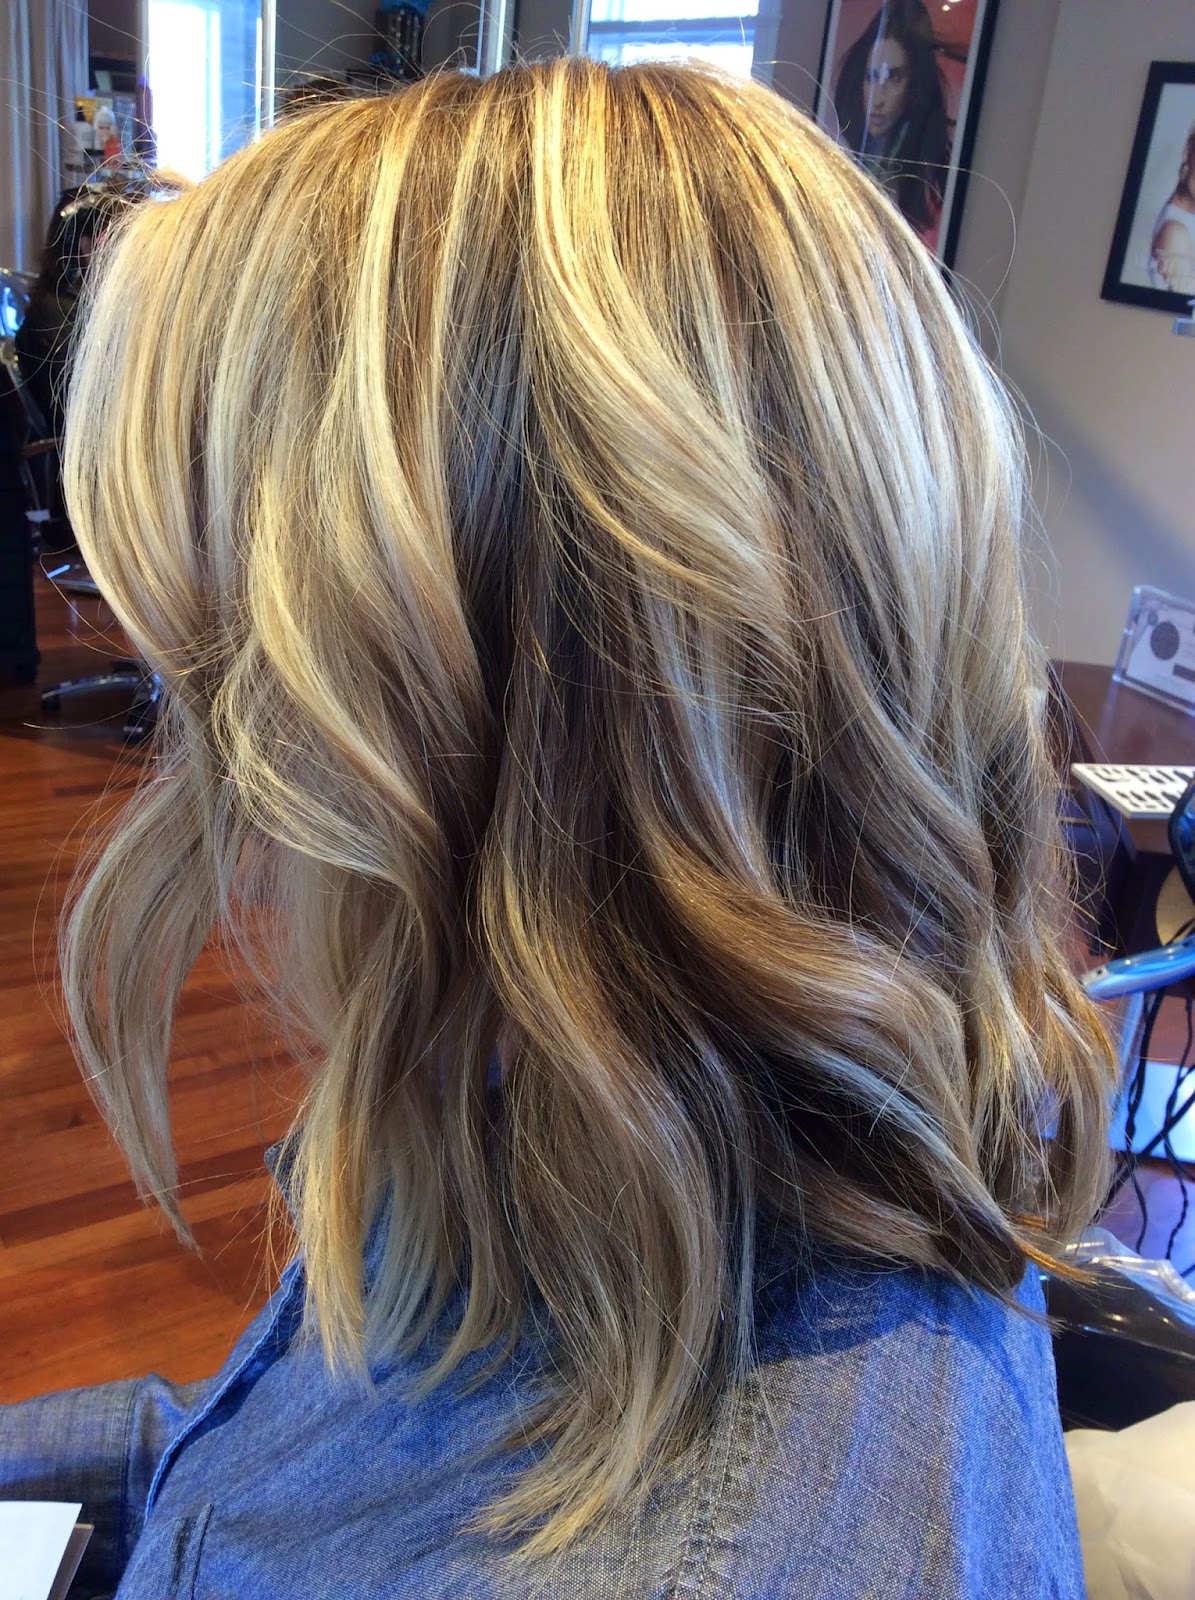
As you can see, Francesca's hair wasn't fried or stringy, just maybe a little dry since shes had a relationship with bleach for quite some time now. Once she had made the decision of going significantly lighter, she knew a haircut was going to be in her near future.
Not only did she come in for a fresh new cut a week after her color appointment, she also had 2 beneficial treatments with her service. This is how you do a hair appointment right. Color, cut and 1-2 treatments every time you come into the salon. All my blonde clients constantly ask me why there hair just doesn't feel as healthy and vibrant as it used to. I'll tell you why.
You don't take care of it.
Even if I gave you the most hair color you have ever seen, it will never look right if you don't get a haircut.
The picture up top is a timeline of what we did with Francesca. In picture number 1, she came in with some old grown out highlights. Being that her base color is so dark, its tough to get her as light as she usually likes it. Since foils weren't blonding as much strands of hair as she wanted, we decided to just go in and do a full Balayage.
In picture number 2, it shows what her hair looks like after we balayaged everything. We brought her up to a gorgeous beige toned blonde. I couldn't believe we finally got her to that almost white blonde that shes been hoping for forever.
Picture 3 is when the real magic happened. When she said haircut, I just figured she meant a trim to clean up her ends and bring everything together. After a few minutes in the chair with one of our stylists, I looked over and was so happy with what I saw. She chopped at least 3 inches and completely transformed her color. Her hair was falling so beautifully with her freshly cut layers and her blonde had a shiny, glossy finish. It allowed her natural dimension to shine through, giving her a rooty, lived in effect.
Francesca is a perfect example of what a client should do after a color appointment. It shows that if you want your color to look gorgeous and healthy, get a haircut.
Wednesday, May 20, 2015
Doughnuts at Home
Everyone has that go-to recipe for when they're in a hurry. There have been countless times when I want to show up to a home with baked goods and not enough time to whip up what I need, until I found this recipe.
Ina Garten is my favorite chef. You may also know her as the Barefoot Contessa with a show on Food Network. Any recipe that she puts out to the public has always been a loved meal in my home, shes never failed me. My first book that I bought by her is called "Foolproof". The meaning is in the title. It is impossible, unless you have bad luck in the kitchen, to mess up any of her recipes.
One of my favorites are her Cinnamon Baked Doughnuts. Every time I bring a batch into a room they are gone within 5 minutes. They're always sure to be a hit and it makes it seem like you spent all day baking when really it takes a very short time. Since its such a loved dessert everywhere I go, I thought I would do everyone a favor and share the recipe, courtesy of Ina Garten of course.
You will need a 2 doughnut pans for this recipe. You can get them at your local chef central or whatever kitchen appliance store you have around your area.
Cinnamon Baked Doughnuts
Baking spray
2 cups all-purpose flour
1 1/2 cups sugar
2 teaspoons baking powder
1 teaspoon ground cinnamon
1/2 teaspoon ground nutmeg
1/2 teaspoon kosher salt
1 extra large egg,lightly beaten
1 1/4 cups whole milk
2 tablespoons unsalted butter, melted
2 teaspoons pure vanilla extract
For the Topping
1 stick unsalted butter
1/2 cup sugar
1/2 teaspoon ground cinnamon
Directions
Preheat the oven to 350°. Spray the two donut pans.
Into a large bowl, sift together the flour, sugar, baking powder, cinnamon, nutmeg and salt.
In a small bowl, whisk together the egg, milk, melted butter, and vanilla.
Stir the wet mixture into the dry ingredients until just combined.
Spoon the batter into the baking pans, filling each one a little more than three quarters full.
Bake for 17 minutes and then allow to cool for five minutes.
Tap the donuts out of the pans.
For the topping, melt the butter into a pan.
Combine the sugar and cinnamon in a small bowl.
Dip each donut first into the butter and then in the cinnamon sugar either on one or both sides.
Enjoy!
Friday, April 17, 2015
The Best of Belgium
It's really special when you know how to make your own Belgium waffles. It's amazing how we thought having Eggo's for breakfast was a gourmet treat at the age of 10 years old. I'm happy to say my taste buds have evolved since then. I'm always on the hunt for a different and exciting way to make breakfast. Yes, this is what my free mornings consist of. Pinterest is so great for that. It's the mecca of recipes. Anything you want to find, it's on there. The place is a goldmine. As I was searching through for some new waffle recipes, everything kind of looked to similar and nothing really caught my eye. Finally, I found what a was looking for.
Leige Waffles. Never heard of them but they sounded delish. After reading what they actually were, it's basically the waffles that they actually make in Belgium. Not the Americanized version of waffles you get in your local diner. These are better. They're like having dessert for breakfast. Picture a croissant, brioche bread, and a waffle all in one. It's like being able to make a homemade pastry right in your own kitchen, just in waffle form. The difference between this and the americanized version is that this is not a mix, it's a dough. A beauitful mound of buttery dough pressed into a waffle iron with specks of pearl sugar that are caramelizing as it bakes. Yea, it's as good as it sounds. It was even better when I topped it with some tiramisu gelato. Thanks Talenti.
Making the dough is a little time consuming. If your planning on having them right when you wake up, I suggest making the dough the night before. If your having them for brunch then you just have to wake up a little earlier to get them started. It's well worth it.
Liege Waffles
1 packet of dry yeast (7g, 1/4oz)
1/3 cup lukewarm water
1 1/2 tbsp white sugar
1/8 tsp salt
2 cups plain flour
3 eggs
220g unsalted butter, softened (1 cup)
1 cup of pearl sugar
Place the flour into a large bowl or into the bowl of your electric mixer fitted with a dough hook. Make a well in the flour and pour in the yeast mixture. Begin to knead.
Still kneading, add the eggs, one at a time. Then add the butter about 2 tablespoons at a time, mixing until each addition is incorporated. The final dough will look like a mixture between cake batter and bread dough.
Cover the bowl with plastic wrap and allow the dough to rise until it doubles in size. I let it rise from about an hour to hour and a half.
After it's done rising, gently mix in the pearl sugar and let it rest for 15 minutes. Meanwhile, heat your waffle iron.
Pearl Sugar can be found in your local health food store or somewhere like Sur La Table. It's a little tricky to find so if you rather make it at home, you can do that do. It's really just clumped up sugar. Heat a cup of sugar with one tablespoon of water over low heat and stir until small clumps form. Let it sit over heat about 10 minutes, stirring occasionally. Remove from heat and let it cool.
When ready, take an ice cream scoop and scoop a couple of tablespoons of dough onto each section of the waffle iron. Close and let cook for about 5 minutes. Check waffles every once in a while to make sure they are not burning and everything is cooking evenly. This recipe makes about 12 waffles.
If you're anything like me, you can have ice cream at any time of the day. My personal favorite is Talenti Gelato. Each flavor is so smooth, rich and creamy and it blows regular ice cream out of the water.
I took Talentis' newest flavor, Tiramisu, and scooped it in between two of my Liege Waffles. This is what breakfast is all about.
Tuesday, April 14, 2015
Discovering Breakfast
Breakfast is for sure my favorite time of the day. There are so many possibilities. It sets the tone of your mood and daily activities, at least it does for me. If I have a less then perfect breakfast, it throws off everything else that I do. There is no other way to make me more "hangry" then skipping that first meal. By the time lunch rolls around, I'm so hungry and flustered that if you ask me what I want to eat, I can't even process my thoughts. I get so mad at myself that I skipped my first and favorite meal of the day, I wine loud enough for the whole world to hear. That being said, I really try not to skip breakfast.
Everything has trends, even food. The latest trends in the world of breakfast seems to be these breakfast bowls. Its like a parfait transferred into a bowl, with more ingredients and, in my opinion, easier to eat. Parfaits always looked good to me, but I never wanted to take the effort to make one. Too many layers and steps for something so simple as breakfast. This is probably why people usually pick one up at their local deli instead of going through all the hoopla in their own kitchen. Breakfast shouldn't be stressful, and if it is, you're doing something wrong.
It's a gloomy day here in New York. This makes motivation to do anything at an all time low. The clouds are grey and so is my mood. The first thing I do in the morning is go into my kitchen and figure out what I'm going to eat. On days like this, I prefer to make minimal efforts. First, I thought waffles. But, did I really want to stand over a waffle iron after making a batter from scratch? Nope, too much work. I thought maybe if I came back to bed, it will come to me. Instagram is great for times like these. Just search up some breakfast and brunch hashtags and there you have it, your next meal. As I'm searching, all I see are these fabulous breakfast bowls that you can just throw everything but the kitchen sink in. This seemed right down my alley on a day like this.
This breakfast bowl was so easy to make. It was so colorful that it actually added a burst of brightness to this depressing overcast. All I did was mix some yogurt and almond milk so the yogurt had more of a smooth consistency. After, I took a handful of frozen blueberries and heated them up in a saucepan so the juices would get nice and runny. I sliced up some banana and then put a handful of granola right in the middle. Just like that I had my first breakfast bowl. I have a feeling im going to be experimenting alot with this new trend. Thanks to breakfast bowls, it was a good morning.
Heres to many more 💕☀️
Friday, February 6, 2015
Favorite product for winter
I hate everything about the winter. Seasonal depression is at an all time high this year right along with hibernation. The constant snow and low temperatures make it so unappealing to leave the house. Not only does the frigid air affect the ability to enjoy anything, it also has big affect on your hair.
When the weather is dry and lacking any moisture in the air, your hair can become dry and brittle, causing breakage to happen. This is the season where nourishing and taking care of your hair really counts. Adding an extra step in your hair care routine can make all the difference.
Spending time in a salon everyday really allows me to try a variety of products and see which ones appeal to me most. This doesn't mean I'm just trying them on myself. I get to see what products are best for many different hair types. Kerastase is a luxury hair care brand by L'oreal and has amazing masks for you to use at home or even to get a treatment with in the salon. For the winter time, the Masquintense by Kerastase has been my go-to product for moisture.
Hair Types
Although amazing, this mask isn't for everyone. This mask is extremely concentrated, which means it can be on the heavier side. If you get oily roots faster then you would hope, then you may need to opt for something lighter. If your used to just putting your conditioner towards the mid shaft and ends of your hair, then you can do the same with this mask. This mask also isn't for hair with a finer texture. If your always trying to bump up the volume in your hair, try something different.
This mask is for you if you have dry and sensitized hair. Whether it's from overusing hot tools or over processed hair from color, this mask can give you the moisture it needs to get healthy and beautiful.
How to use
To get the full benefits from this mask, it should be used the right way. After shampooing your hair thoroughly, towel dry and get all the excess moisture out. Apply the mask to your hair in sections while combing through to make sure the mask is distributed evenly. Place a plastic cap over your hair to keep moisture in. Let it sit for 25 minutes then rinse with cool water. Do this once a week and you will feel the difference!
Friday, January 9, 2015
Pinching your Pennies
Getting your color done is expensive, I get it. Going to the salon every time you need a root touch up can empty your pockets real fast and make it an unenjoyable experience. Getting your hair done should be a treat, not a chore. No one wants to be sitting and dreading about when they finally have to checkout. After a few times of this happening, you finally resort to the dreaded box color from your local drugstore and when you run into a color mishap, it's back to the salon with a color correction that you'll be charged like crazy for.
Luckily, there are actually ways you can get your hair done, by the professionals, without spending your whole paycheck.
1. Opt for hairline process instead of a full single process
I have some clients coming to me every 3 weeks to get their roots touched up. Coming in that frequently can get pretty pricey and become unaffordable. This is when I recommend getting hairline process instead of a full single. Instead of doing the full root touch up, I'll just do around the perimeter of the head and crown area, leaving out that section in the back of the head that no one sees. This can cut your bill back up to 35 dollars.
2. Keep up with your glosses
Many times you can get to that annoying stage with your color. It's that stage where you're not quite ready to get your roots touched up but your color is fading out or getting brassy and needs be spruced up a bit. Getting a gloss done will freshen up your color and help it last a little longer between appointments. A gloss typically ranges from $40-$55, much less than a root touch up.
3. Get a base break
The most irritating thing for blondes is when those highlights start growing out and the dark roots start coming in. Shelling money out for highlights every 8-10 weeks isn't so fun. A base break is an inexpensive way to soften up your base color in between while stretching out that time frame. What it does is it lightens up your base color by a half of a shade, making everything appear brighter and more natural. It's a lot easier on the pockets compared to highlights.
4. Go for a face-frame
Many clients think the only options for highlights are either partials or full heads. The face frame highlight is usually overlooked. Getting constant partials and full heads usually result in a over processed, overly lightened blonde. Most of the time, a face frame is all you really need. A face frame is highlights that are put around the front if the face and maybe a few in the crown area. This also allows dimension to be kept in the hair over time. This is a great alternative for a quarter of the price for a full head.
5. Try some balayage
Covering up gray roots are one of the most common reasons for getting a single process. Gray roots creep up on you pretty fast, especially for brunettes. That white hair against a dark haircolor can be annoyingly noticeable. Getting some lighter balayage Peices around the frame of the face and crown area can soften up the growing out process and can even stretch your next hair appointment for a few weeks. That's money saving in itself.
Hopefully, you read these carefully, don't resort to the box, and leave the color to us. These are great ways to save money while sticking to the professionals.
Subscribe to:
Posts (Atom)